|
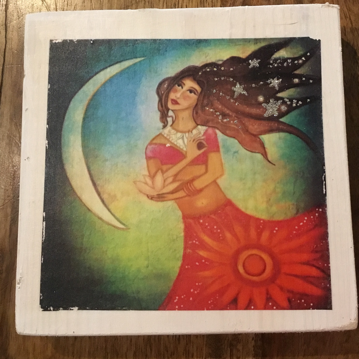
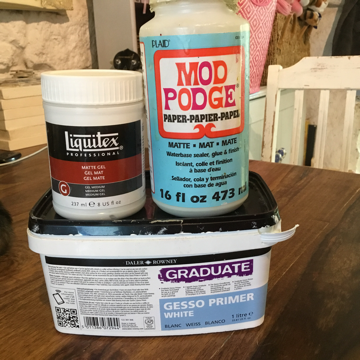
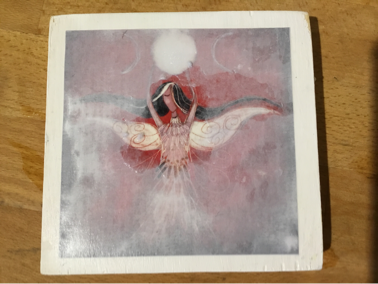
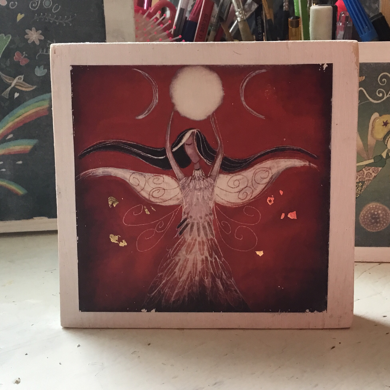
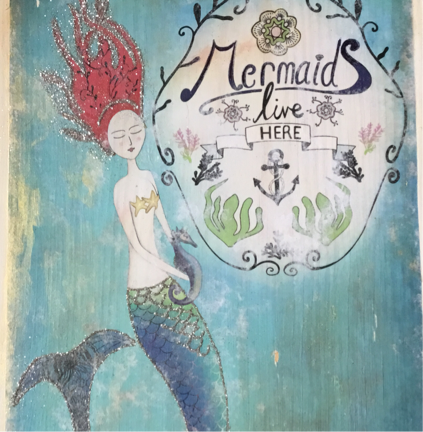
This is such a fun thing to do and it has a lot of creative scope. I have only been playing about with transferring my images to wood, but you could get pictures of friends and family to make gorgeous gifts and personalised presents. Or you could even transfer images of flowers (or whatever you dream of) onto your furniture to really give it a personal and magical touch. This is just the beginning of the journey! I have learned a lot already and it is definitely a matter of practice makes perfect, but I think I can point you in the right direction and alleviate any concerns. There is something a little mystical about this process and the best thing to do is jump right in! Don't be scared! Visualise your project So first things first. You need to decide what you want to create and what size. Supplies You will need to get your image laser printed.( I've been getting my prints from here and they will post which makes things really easy - http://www.compuprintcornwall.co.uk) NOTE: the transfer process reverses the image, so remember to mirror your image before getting it printed. I bought my wood from Solo supplies. I got a couple of lengths at different widths to fit my images. Prep My husband (thanks Darren) cut them down to size and then I sanded them to get rid of the rough edges. I then primed each side using Gesso, but don't worry if you don't have this. You can leave the wood as it is, which saves a job, but you lose some of the brightness of the image. You can use other paints to prime your wood, so take a look in your shed to see if you have any white paint leftover. This will work just fine (I watched a YouTube video where emulsion and gloss were both tried and they both worked out fine) Supplies 2/magic goo So at this stage, you have a lovely piece of wood at the perfect size for your picture. Trim of any excess paper from your picture - this will help you to place it in the right place easier. You might want to make light pencil marks (really light! I've had to paint over pencil marks as I wasn't able to erase them) to help you place your image. The magic goo that I use is called Liquitex. There are other things out there, so feel free to research, but this stuff works and you can get a decent sized pot of it for under a tenner. Slather the goo on and put your picture on top, with the image pressing onto the wood like it's the filling in a sandwich. It's okay to move the picture around a little bit at the stage if you need to centre it better. You can then use a loyalty card or credit card to remove air bubbles, by lightly and slowly sweeping from from the centre of the picture to the edges. This is a really important stage. Don't be too heavy handed as you can tear the softened paper. The bubbles need to go though and the paper has to be in perfect contact with the wood in order to transfer properly. Don't touch it! Once you have got all the air bubbles out you need to leave it alone to dry. I have read people's recommendations vary from leaving it from 2-8 hours. I don't know what's best, so I leave it overnight! The magic begins! This is where things get exciting (and then a little boring!) Get a bowl of water and wet your fingers. Start doing circular movements in the middle of your picture. It can take a little while before the paper starts to come away, but it's a bit like removing wallpaper, in that once you have a section coming off, it gets easier. I then start pushing the paper off in a rolling motion (this seems to work quite well, but do what works for you). I have experimented with really soaking the paper first before trying to remove it and also just using a little bit of water. I have also tried using rags as well as my fingers. It all works. You can actually rub quite hard, but you do want to be a little cautious so as not to remove the image. I have been working really lightly and still lost some of the picture and so I think that actually this probably was a result of not getting the bubbles out properly in the early stages. I like to use my fingers as you can really feel what is going on! You will get to a stage where it looks like all the paper has come off WELL DONE! Blog the picture with a towel and make yourself a cup of tea. You will see that as it dries you will be able to see the fuzzy whiteness of the paper appearing. You will need to repeat the process again up to 8 (!) times! The first time is the most time consuming however and you will want to use your fingers so that you can really feel the paper come off. This is important as you might not be able to see it at this stage. You could use a hair dryer to speed this process up if you are super keen. If you want your picture to look a little aged then you can use your finger nails to scrape a bit of the picture away at the edges. Finishing up and troubleshooting
To finish your piece you need some PVA glue of Mod Podge to seal it in and also get rid of the last bit of whiteness. NOTE: even after rubbing away for ages you will be left with a haze, but this will go with the PVA. Just spread a nice even coat over the picture and allow to dry. If it looks as if you still haven't got rid of the paper then it's not too late to wash the glue off and have another rub. Don't leave it too late though or it will have done its job and sealed the picture. At this stage you might want to use glitter, gold leaf, distress inks or even paint to personalise and decorate the picture even further. I think that this is really exciting as you could decoupage on other images, add some more gesso and carry on painting.... There really is a lot of potential and the effect is pretty fabulous. I just love seeing my work looking so chinky and solid! I will get some more pictures to help illustrate the process better and I'm also going to do a video tutorial which should be fun! I will take you through the process so you can see my techniques! Feel free to ask any questions in the meantime however and please share your projects with me! I'd love to see your creations! Best wishes and fairy kisses xxx Jacs xxx
0 Comments
Leave a Reply. |
Archives
December 2020
|

 RSS Feed
